
Run your own network monitoring server
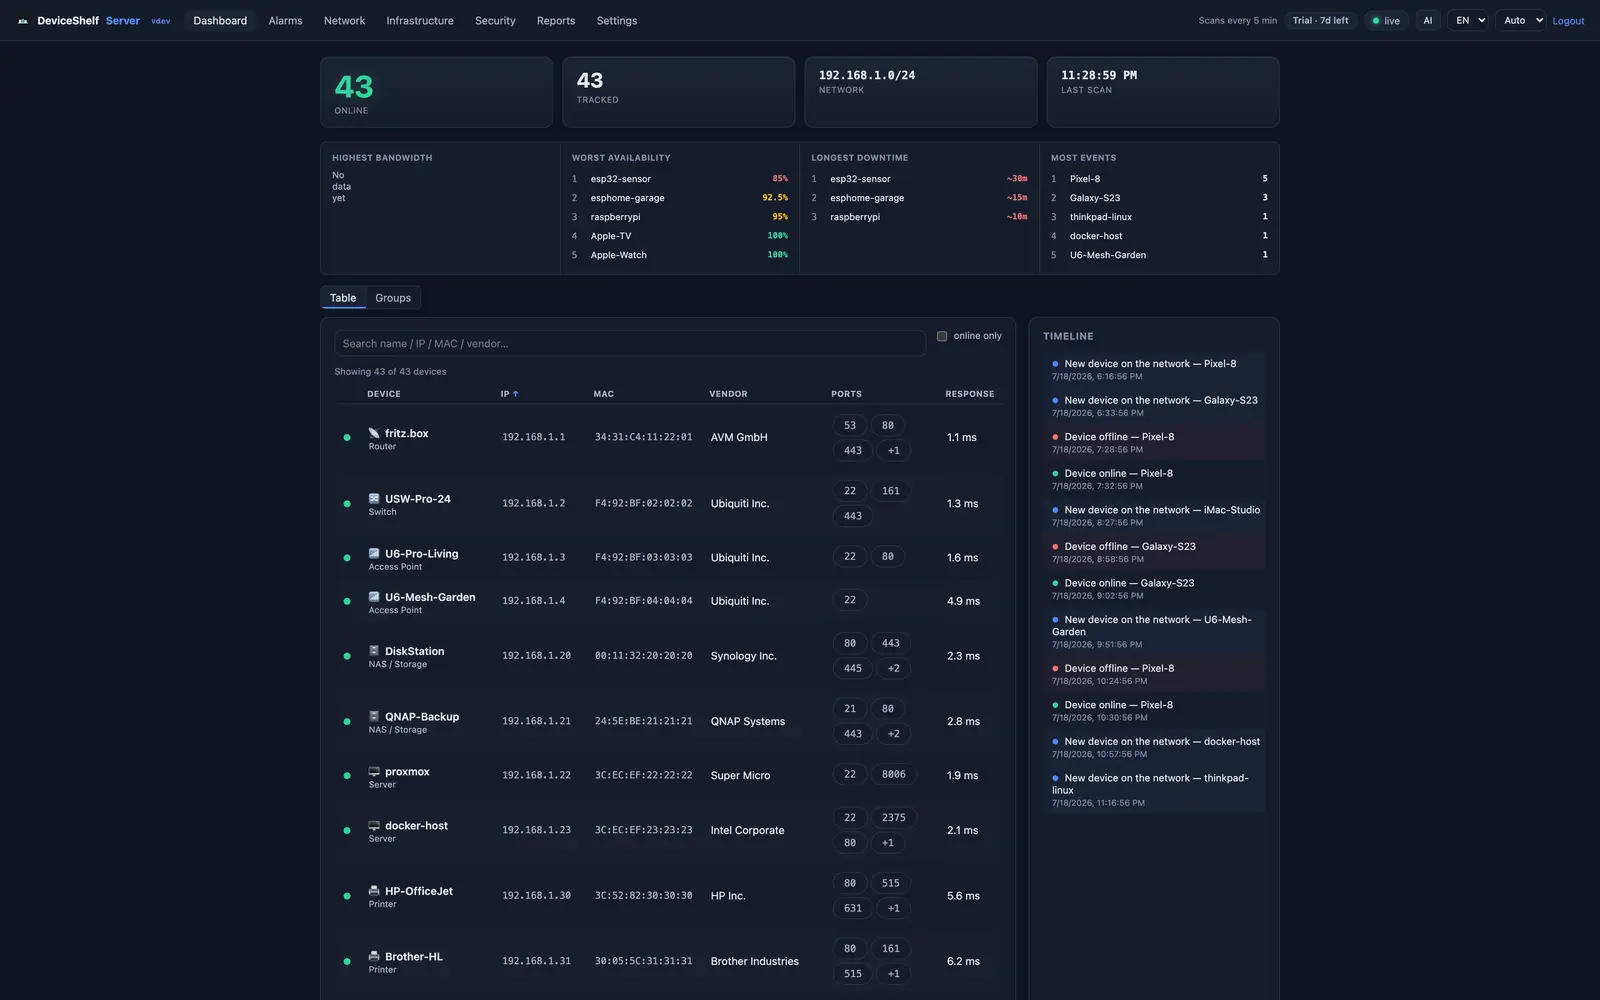
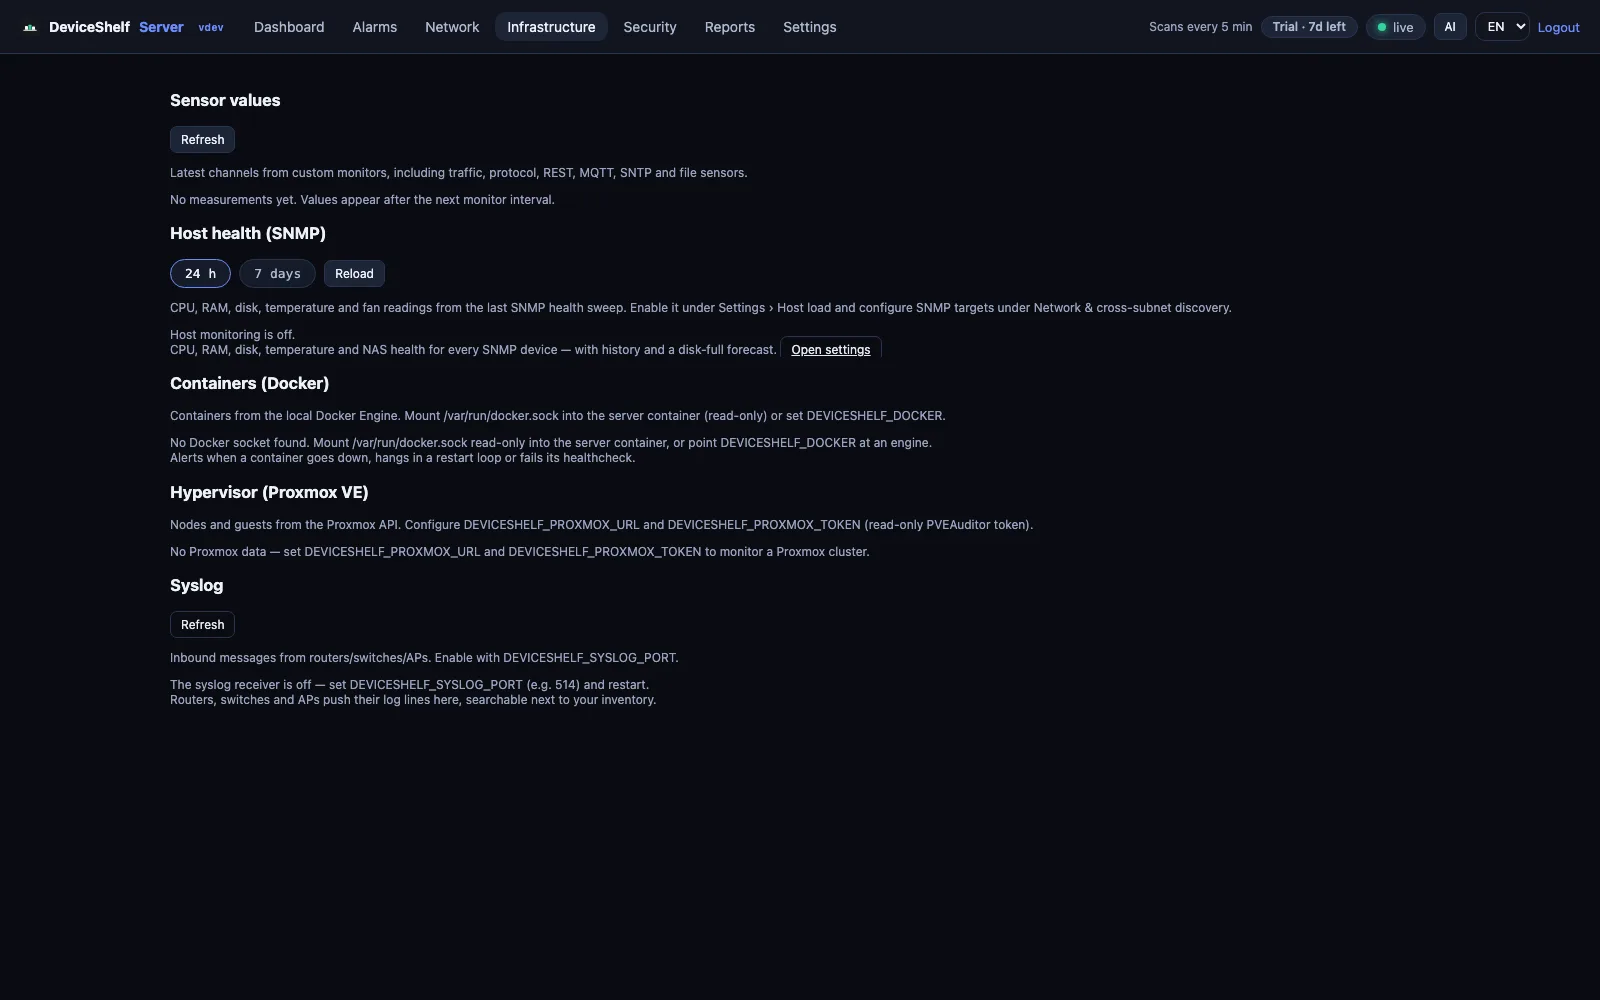
Install the headless edition on a Linux, Windows or Docker host and DeviceShelf becomes a local collector for device discovery, uptime/SLA, infrastructure health, service checks, heartbeats, alerts, reports, API automation, Prometheus and MCP. Same license as desktop and mobile.
What the server edition does
Always-on monitoring
Runs headless 24/7 and keeps watching the networks you care about — even when your desktop is off.
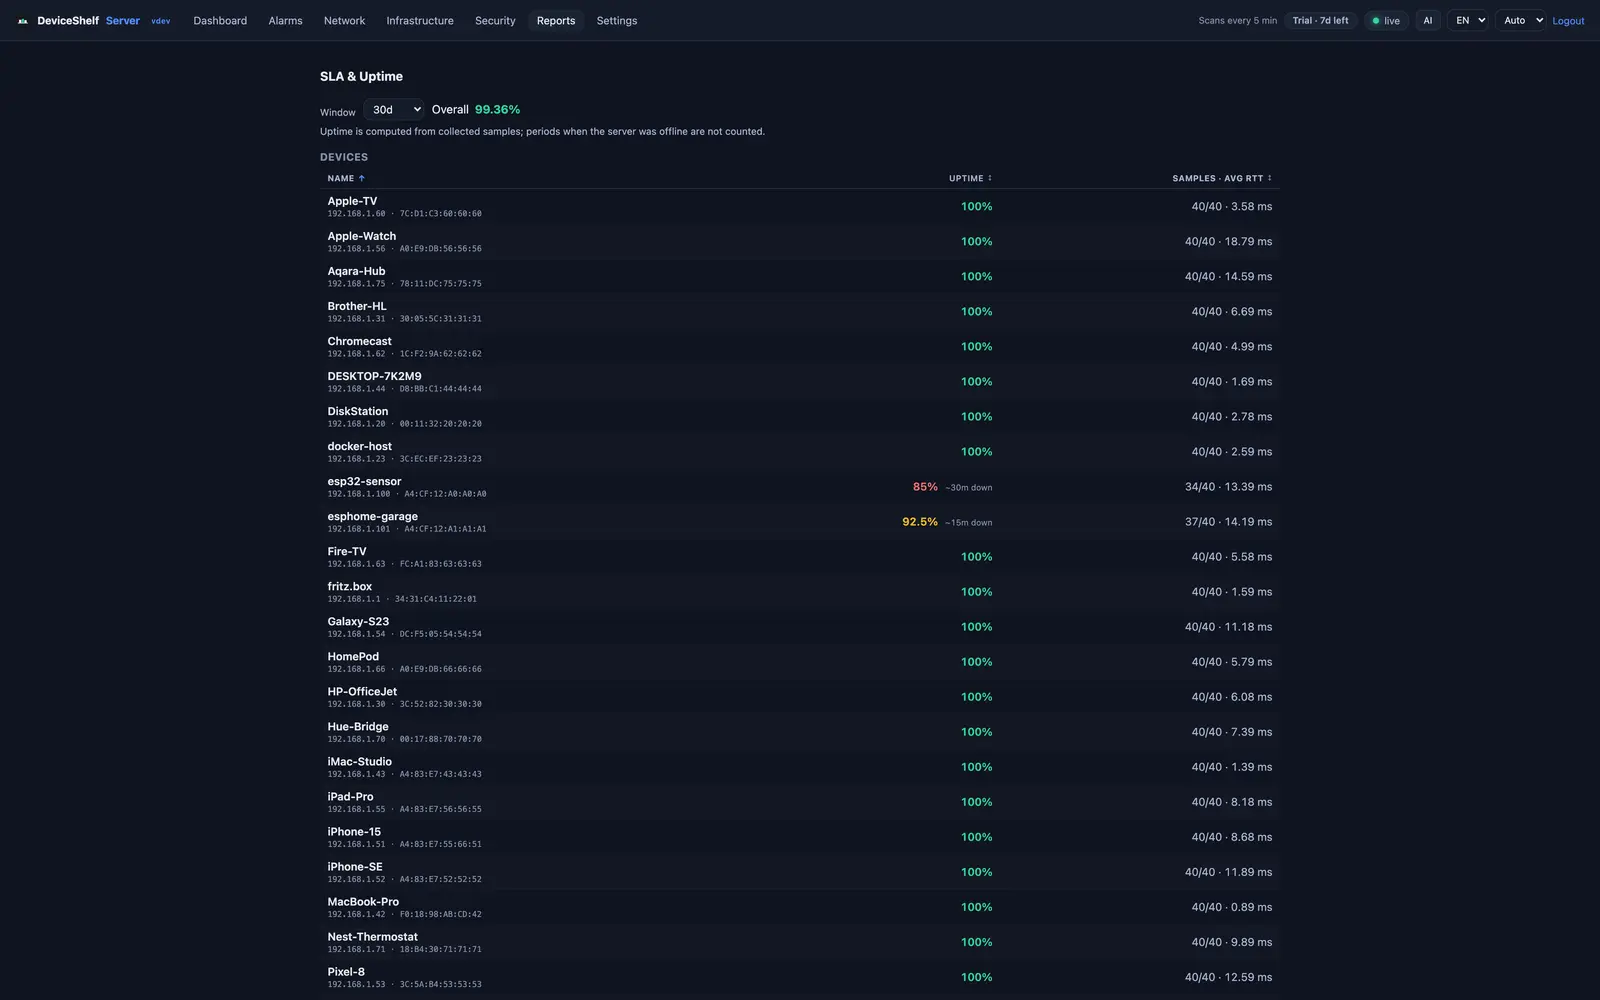
Uptime & SLA tracking
Daily availability per device and service, with retries, dependencies and CSV export.
Alerts without the flood
Email/SMTP, ntfy, Gotify and webhooks — with severity routing and digest batching.
Public status page
An optional read-only health page anyone can see — no login required.
Cross-subnet discovery
SNMP and multi-NIC support to reach networks beyond the local segment.
Ask your AI (MCP)
Expose your live inventory to an AI assistant — strictly local, read-only, off by default.
Reports, status and backup
Uptime %, daily availability bars, CSV export, public read-only status page and configuration import/export.
REST API and Prometheus
Everything is scriptable through the token-guarded API, with `/metrics` for Grafana and automation.
Home Assistant
Publishes your devices to Home Assistant over MQTT. Presence, vendor and type, plus network events an automation can react to.
Docker easiest
Save this as docker-compose.yml and run docker compose up -d. network_mode: host lets it see your LAN; the two capabilities are explained below.
services:
  deviceshelf:
    image: ghcr.io/wealthwallet/deviceshelf-server:1.9.68
    network_mode: host
    cap_add:
      - NET_RAW              # ARP scan (raw sockets)
      - NET_BIND_SERVICE     # passive DHCP fingerprinting (UDP/67) → Fingerbank
    volumes:
      - ./data:/data         # chown 10001:10001 ./data
    restart: unless-stopped
    # optional: environment: { DEVICESHELF_FINGERBANK_KEY: "<free key from fingerbank.org>" }
Why these capabilities? DeviceShelf Server identifies devices partly by their DHCP fingerprint and listens passively on UDP port 67. Because the container deliberately runs as a non-privileged user (uid 10001), binding that system port needs the narrowly-scoped NET_BIND_SERVICE — no root, no NET_ADMIN, just opening low ports. Without it the server still starts normally, only without DHCP/Fingerbank identification. NET_RAW is for the ARP scan.
Debian / Ubuntu (.deb)
Install from the terminal — do not double-click. On Ubuntu 24.04 a double-clicked .deb opens in the App Center, which can fail silently for third-party packages. The terminal resolves dependencies and starts the deviceshelf-server service:
Download .deb — amd64 (Intel/AMD) Download .deb — arm64 (Raspberry Pi)
sudo apt install ./DeviceShelf-Server-*.debOn ARM (Raspberry Pi, ARM servers) use the -arm64.deb file.
macOS Server (.pkg)
Download and open the universal package. It installs the server as a background LaunchDaemon and keeps it running after login. The dashboard is available on port 8088; updates preserve the server data and create a verified backup first.
Windows Server / Windows 11
Download the zip, extract it, and double-click install.bat — confirm the Windows admin prompt (UAC). It installs and starts the 24/7 service, then shows the dashboard URL and access token and opens the dashboard. Uninstall with uninstall.bat.
The Windows build is not code-signed yet, so Windows may warn: on SmartScreen click More info → Run anyway; if Smart App Control is on it blocks unsigned apps entirely until we ship a signed build. Before extracting, you can right-click the zip → Properties → tick Unblock. Full details are in the README inside the zip (7 languages). Passive DHCP fingerprinting isn't available on Windows; everything else — scanning, monitoring, SNMP, alerts, dashboard, API — is included.
First start: the access token
On first start the server prints an auto-generated API token to its log. Grab it, then open the web UI on port 8088 and paste it:
# .deb / systemd:
journalctl -u deviceshelf-server | grep -iA1 auto-generated

# Docker:
docker logs deviceshelf-server | grep -iA1 auto-generated
Then open http://<host>:8088 in your browser and paste the token.
Read the server from the desktop and mobile apps
You do not have to work in the web dashboard. The desktop app for macOS, Windows and Linux and the mobile app pair with a server and show its data in their own interface. On the desktop open Remote servers, press Discover or enter host and port, and paste the API token from above. Then choose the server in the source selector above the device list, on its own or merged with the local scan. What comes across: devices with their history, alarms you can acknowledge, checks, monitoring, health, Docker, Proxmox and topology.
Devices a server reports are read-only in the apps. Waking, port-scanning or connecting to them would run from the device in your hand, not from the server, so those actions stay with the local scan. If the server should be the only scanner, switch off Auto-scan in the desktop settings.
Email notifications (SMTP)
Add your own mail account as the sender in the dashboard's alert settings. For common providers — Gmail, Yahoo, Outlook/Hotmail, iCloud, GMX and others — leave the SMTP server field empty; DeviceShelf detects the right server automatically. Because of two-factor login, Gmail, Yahoo and Outlook require an app password (created in your mail account's security settings), not your normal password. For any other or self-hosted provider, fill in the SMTP server, port and security. Alerts are then sent through your account to the recipients you list.
External watchdog
Every alert DeviceShelf sends runs on your own machine, so none of them reaches you when that machine is the problem — a power cut, a crash, a dead uplink. The watchdog covers exactly that case. Under Settings → External watchdog you paste a heartbeat URL from a monitoring service; DeviceShelf pings it every 60 seconds, and when the pings stop, that service alerts you. Use Healthchecks.io, UptimeRobot (Heartbeat monitor), Better Stack, Cronitor or your own receiver — all of them have a free tier that covers a home network. Set the grace period there to about three times the ping interval, and press Send test ping once to confirm the wiring.
We don't run this service ourselves on purpose. A watchdog has to be more available than the thing it watches and has to sit outside your network, which is the opposite of what DeviceShelf is built to be.
Ask your AI about your network MCP
The server can expose your live inventory to an AI assistant over the Model Context Protocol — so you can ask “what's online right now?”, “why can't I reach the NAS?” or “how risky is this network?” and get answers from your own data, 37 tools in total. It's strictly local: the endpoint runs inside your server, behind the same token, reachable only on your LAN — there is no DeviceShelf cloud connector. Off by default, read-only, and included with your license (it works in the trial too).
# enable it in the dashboard: Settings → AI assistant → tick "Serve the MCP endpoint"
#   (takes effect at once, no restart; a second box allows actions)
# or pin it from /etc/deviceshelf/server.env (or your Docker env), which needs a restart:
DEVICESHELF_MCP_ENABLE=true

# then point Claude Desktop at it via the mcp-remote bridge:
#   http://<host>:8088/mcp   (Authorization: Bearer <your-token>)
See the announcement for the setup and the 1.9.14 post for the diagnostics, history and Wake-on-LAN tools. Actions (rename a device, acknowledge an alarm, trigger a scan, ping or wake a host) stay off unless you explicitly opt in, and they never leave your own subnet.
Connect your AI agent MCP
Enable MCP first (above), then point your AI client at the server's /mcp endpoint with your API token. Replace <host> and <token> below. Most clients speak Streamable HTTP natively:
Claude Code
claude mcp add --transport http deviceshelf http://<host>:8088/mcp \
  --header "Authorization: Bearer <token>"
Cursor — ~/.cursor/mcp.json
{ "mcpServers": { "deviceshelf": {
  "url": "http://<host>:8088/mcp",
  "headers": { "Authorization": "Bearer <token>" }
} } }
VS Code (Copilot agent) — .vscode/mcp.json
{ "servers": { "deviceshelf": {
  "type": "http",
  "url": "http://<host>:8088/mcp",
  "headers": { "Authorization": "Bearer <token>" }
} } }
Windsurf — ~/.codeium/windsurf/mcp_config.json (note: serverUrl)
{ "mcpServers": { "deviceshelf": {
  "serverUrl": "http://<host>:8088/mcp",
  "headers": { "Authorization": "Bearer <token>" }
} } }
Cline — cline_mcp_settings.json ("type": "streamableHttp" is required, else it falls back to SSE and fails)
{ "mcpServers": { "deviceshelf": {
  "type": "streamableHttp",
  "url": "http://<host>:8088/mcp",
  "headers": { "Authorization": "Bearer <token>" }
} } }
Gemini CLI — ~/.gemini/settings.json (note: httpUrl)
{ "mcpServers": { "deviceshelf": {
  "httpUrl": "http://<host>:8088/mcp",
  "headers": { "Authorization": "Bearer <token>" }
} } }
Claude Desktop — claude_desktop_config.json. It has no native static-token remote support, so bridge it with mcp-remote (keep --allow-http for plain http; the token goes in an env var to avoid a Windows arg-quoting bug). Fully quit and relaunch after saving.
{ "mcpServers": { "deviceshelf": {
  "command": "npx",
  "args": ["-y", "mcp-remote", "http://<host>:8088/mcp",
           "--transport", "http-only", "--allow-http",
           "--header", "Authorization:${AUTH}"],
  "env": { "AUTH": "Bearer <token>" }
} } }
ChatGPT connectors run in OpenAI's cloud and cannot reach a LAN server directly. To use them, put the server behind a public HTTPS tunnel (OpenAI's Secure MCP Tunnel, ngrok or Cloudflare Tunnel) so it has an https://…/mcp address. For a strictly-local setup, prefer one of the clients above.
Ready for always-on use
The server edition is now part of the regular DeviceShelf product line. It is still moving fast, but the positioning is simple: run it continuously, keep your data local, and use the same license key as the desktop and mobile apps. See the release notes for what changed in this build.
For the wider picture, self-hosted network monitoring covers what running the watchdog on your own hardware buys you over a cloud dashboard.